集成权限管理Ranger#
前提#
假定我们已经完成
HBase服务端部署,角色规划如下:
Hostname |
oushu1 |
oushu2 |
Oushu3 |
|---|---|---|---|
IP |
192.168.1.11 |
192.168.1.12 |
192.168.1.13 |
HBase Master |
yes |
yes |
no |
HBase Regionserver |
yes |
yes |
yes |
假定我们已经完成
Ranger服务部署,角色规划如下:
Hostname |
ranger1 |
|---|---|
IP |
192.168.1.14 |
Role |
Ranger Admin |
安装ranger-hbase-plugin#
创建一个hostfile文件,包含cluster中的所有机器:
touch ~/hostfile
编辑hostfile文件内容如下(集群各机器的hostname):
    oushu1
    oushu2
    oushu3
所有节点执行yum install安装
lava ssh -f ~/hostfile -e "sudo yum install -y ranger-hbase-plugin"
修改配置#
/usr/local/oushu/ranger-hbase-plugin_2.3.0/install.properties文件修改如下配置(POLICY_MGR_URL中请配置ranger服务所在IP):
    POLICY_MGR_URL=http://192.168.1.14:6080
    REPOSITORY_NAME=hbasedev
    COMPONENT_INSTALL_DIR_NAME=/usr/local/oushu/hbase
    CUSTOM_USER=hbase
    CUSTOM_GROUP=hbase
将
install.properties分发到所有机器
lava scp -f ~/hostfile /usr/local/oushu/ranger-hbase-plugin_2.3.0/install.properties =:/usr/local/oushu/ranger-hbase-plugin_2.3.0/install.properties
在
enable-hbase-plugin.sh第一行添加JAVA_HOME
JAVA_HOME=/usr/lib/jvm/java
将
enable-hbase-plugin.sh分发到所有机器
lava scp -f ~/hostfile /usr/local/oushu/ranger-hbase-plugin_2.3.0/enable-hbase-plugin.sh =:/usr/local/oushu/ranger-hbase-plugin_2.3.0/enable-hbase-plugin.sh
使用sudo权限执行
enable-hbase-plugin.sh
lava ssh -f ~/hostfile -e "sudo /usr/local/oushu/ranger-hbase-plugin_2.3.0/enable-hbase-plugin.sh"
enable-hbase-plugin.sh 脚本会自动往HBase的配置文件路径追加如下文件(检查是否存在):
-rw-r--r-- 1 hbase hbase 10175 Nov 17 17:50 ranger-hbase-audit.xml
-rw-r--r-- 1 hbase hbase  2918 Nov 17 17:50 ranger-hbase-security.xml
-rw-r--r-- 1 hbase hbase  1910 Nov 17 17:50 ranger-policymgr-ssl.xml
-rw-r--r-- 1 hbase hbase    69 Nov 17 17:50 ranger-security.xml
同时还会修改hbase-site.xml文件,自动追加如下配置(检查是否存在):
<property>
    <name>hbase.security.authorization</name>
    <value>true</value>
</property>
<property>
    <name>hbase.coprocessor.master.classes</name>
    <value>org.apache.ranger.authorization.hbase.RangerAuthorizationCoprocessor</value>
</property>
<property>
    <name>hbase.coprocessor.region.classes</name>
    <value>org.apache.ranger.authorization.hbase.RangerAuthorizationCoprocessor</value>
</property>
使用hbase用户登陆oushu1机器,手动修改
hbase-site.xml,追加如下配置:
    <property>
        <!-- 设置HBase的超级管理员为hbase -->
        <name>hbase.superuser</name>
        <value>hbase</value>
    </property>
分发
hbase-site.xml到所有机器
lava scp -f ~/hostfile /usr/local/oushu/conf/hbase/hbase-site.xml =:/usr/local/oushu/conf/hbase/hbase-site.xml
重启HBase
    lava ssh -f ~/hbasemaster -e "sudo -u hbase /usr/local/oushu/hbase/bin/hbase-daemon.sh stop master"
    lava ssh -f ~/regionserver -e "sudo -u hbase /usr/local/oushu/hbase/bin/hbase-daemon.sh stop regionserver"
    lava ssh -f ~/hbasemaster -e "sudo -u hbase /usr/local/oushu/hbase/bin/hbase-daemon.sh start master"
    lava ssh -f ~/regionserver -e "sudo -u hbase /usr/local/oushu/hbase/bin/hbase-daemon.sh start regionserver"
在rangerUI 上配置用户权限策略#
创建HBase Service服务#
登陆rangerUI http://192.168.1.14:6080,点击➕号添加
HBase Service
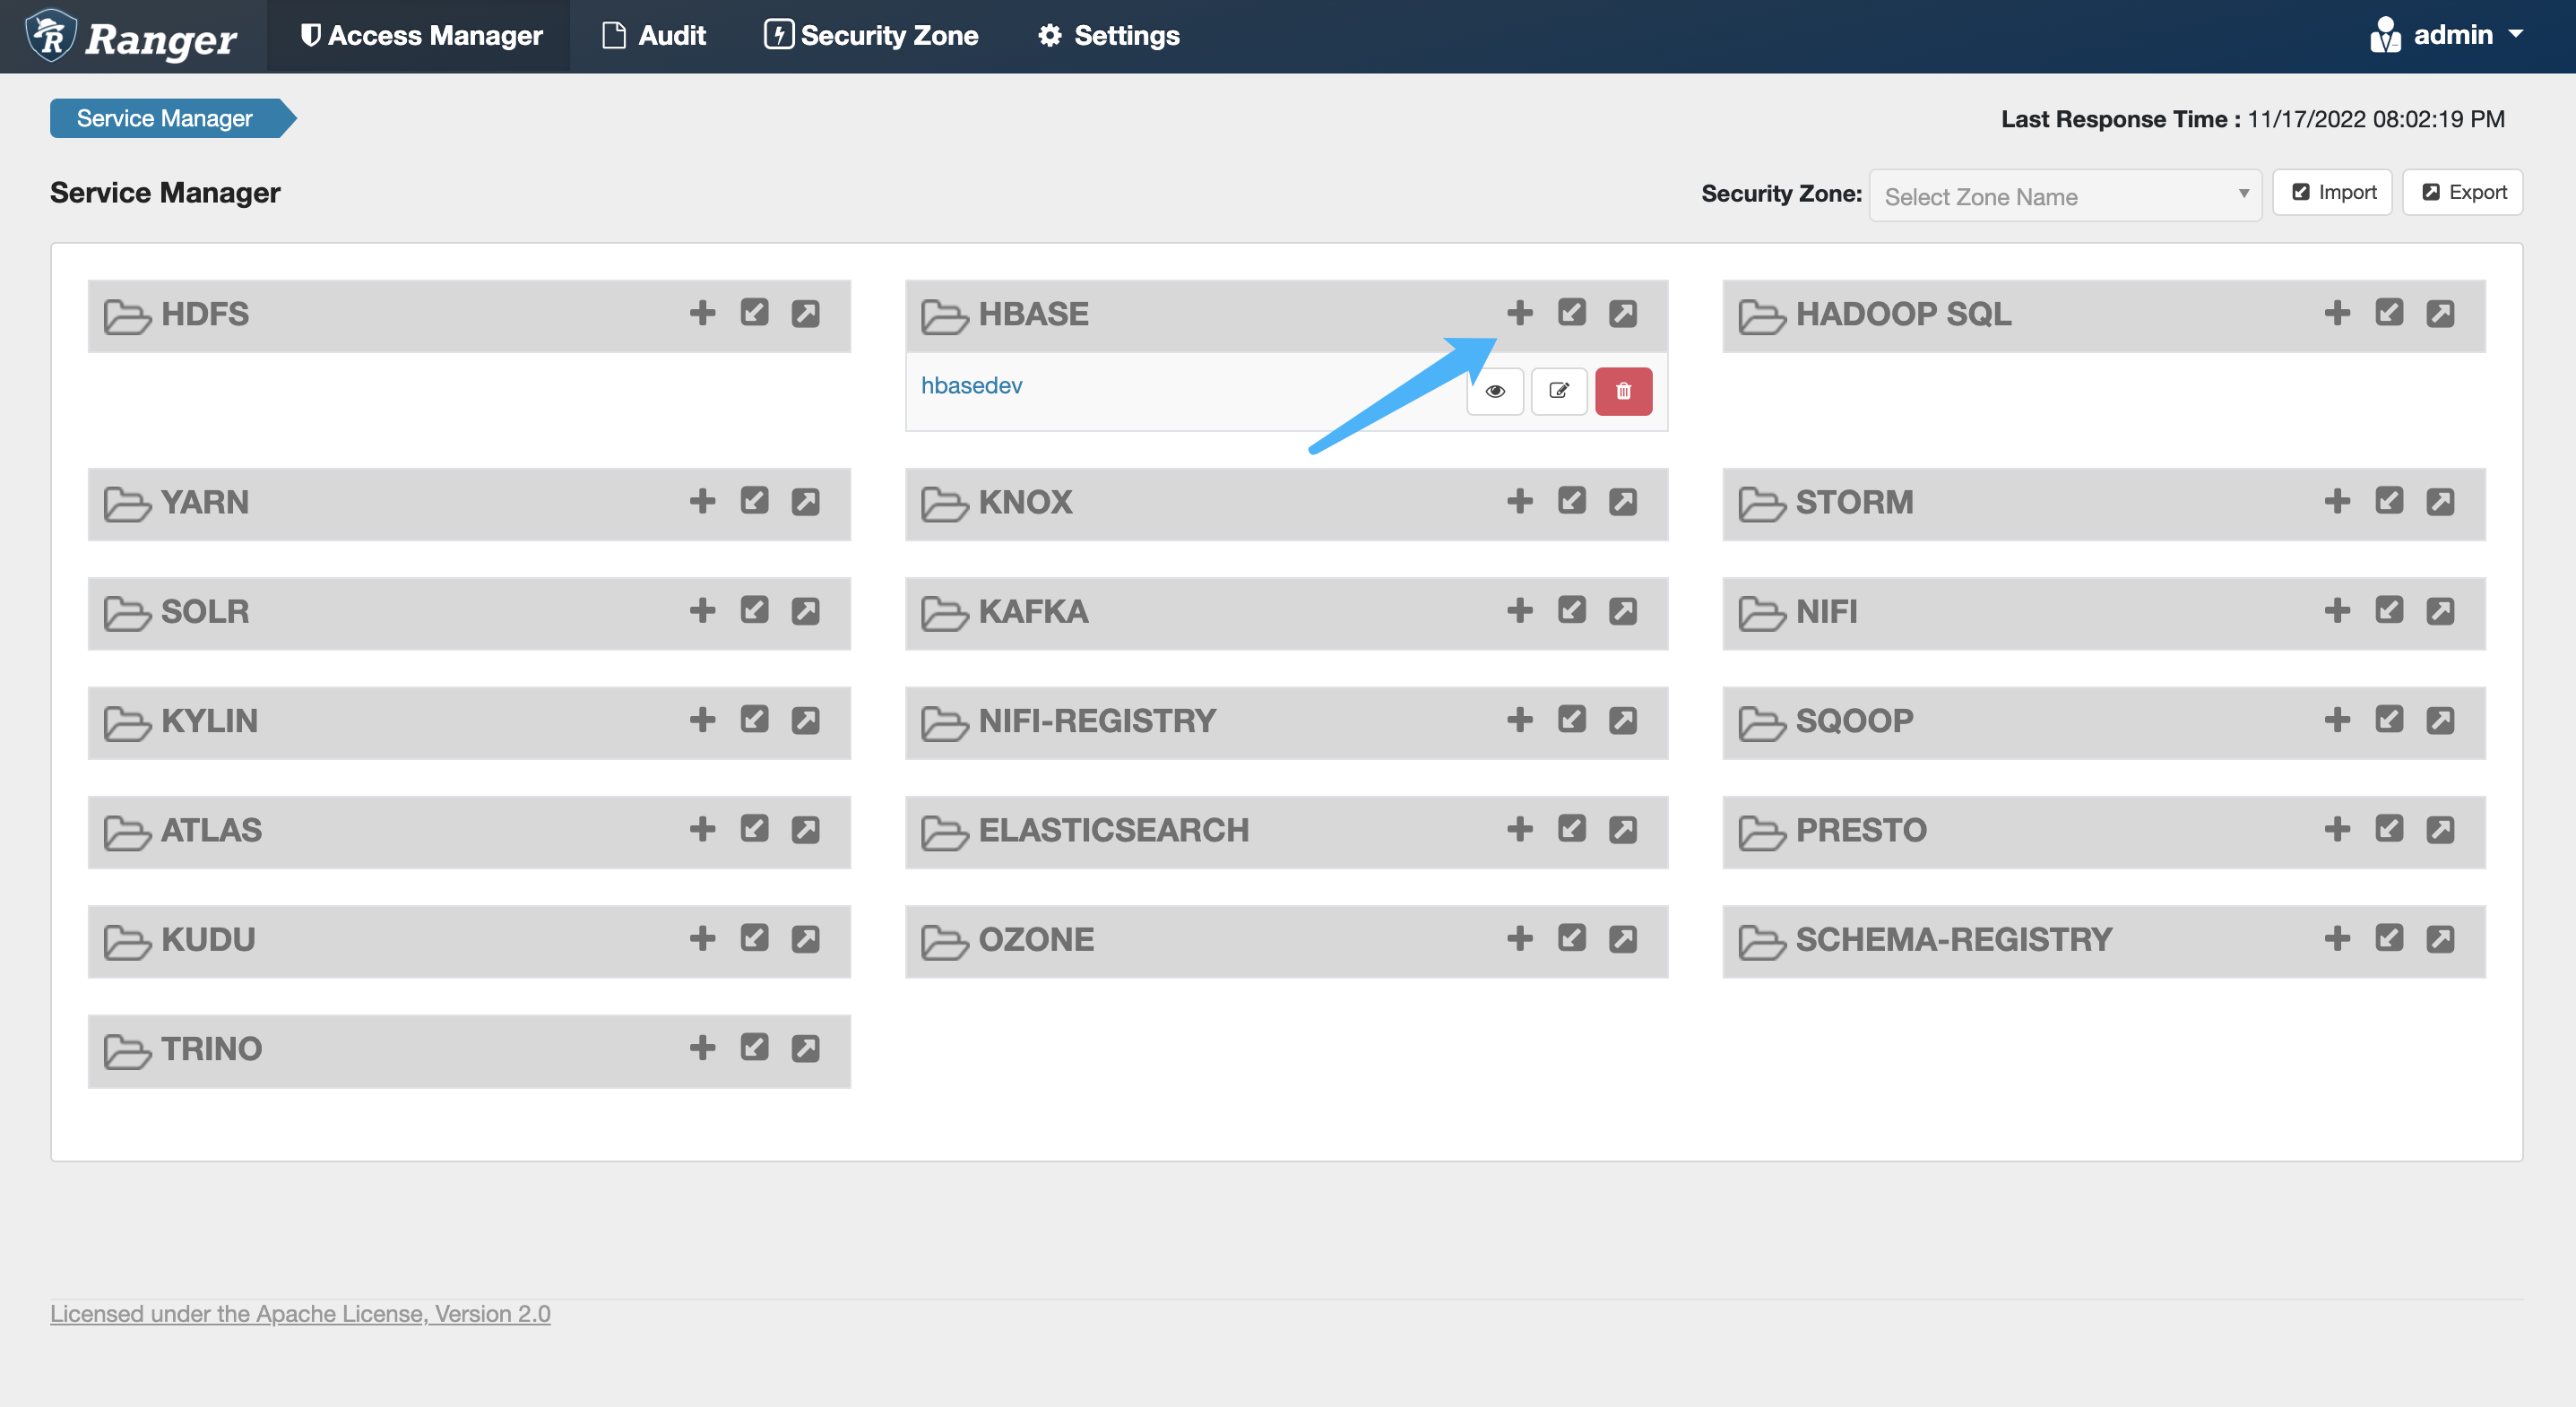
具体参数释义如下:
参数 |
释义 |
推荐值 |
|---|---|---|
Service Name |
服务名 |
hbasedev |
Display Name |
非必填 |
|
Description |
非必填 |
|
Active Status |
是否生效,默认生效 |
Enabled |
Select Tag Service |
非必填 |
|
Username |
用户名 |
hbase |
Password |
密码,随意输入即可 |
|
hadoop.security.authentication |
普通 |
|
hbase.master.kerberos.principal |
普通 |
|
hbase.security.authentication |
普通 |
|
hbase.zookeeper.property.clientPort |
与 |
2181 |
hbase.zookeeper.quorum |
与 |
|
zookeeper.znode.parent |
与 |
|
Common Name for Certificate |
非必填 |
|
Add New Configurations |
普通 |
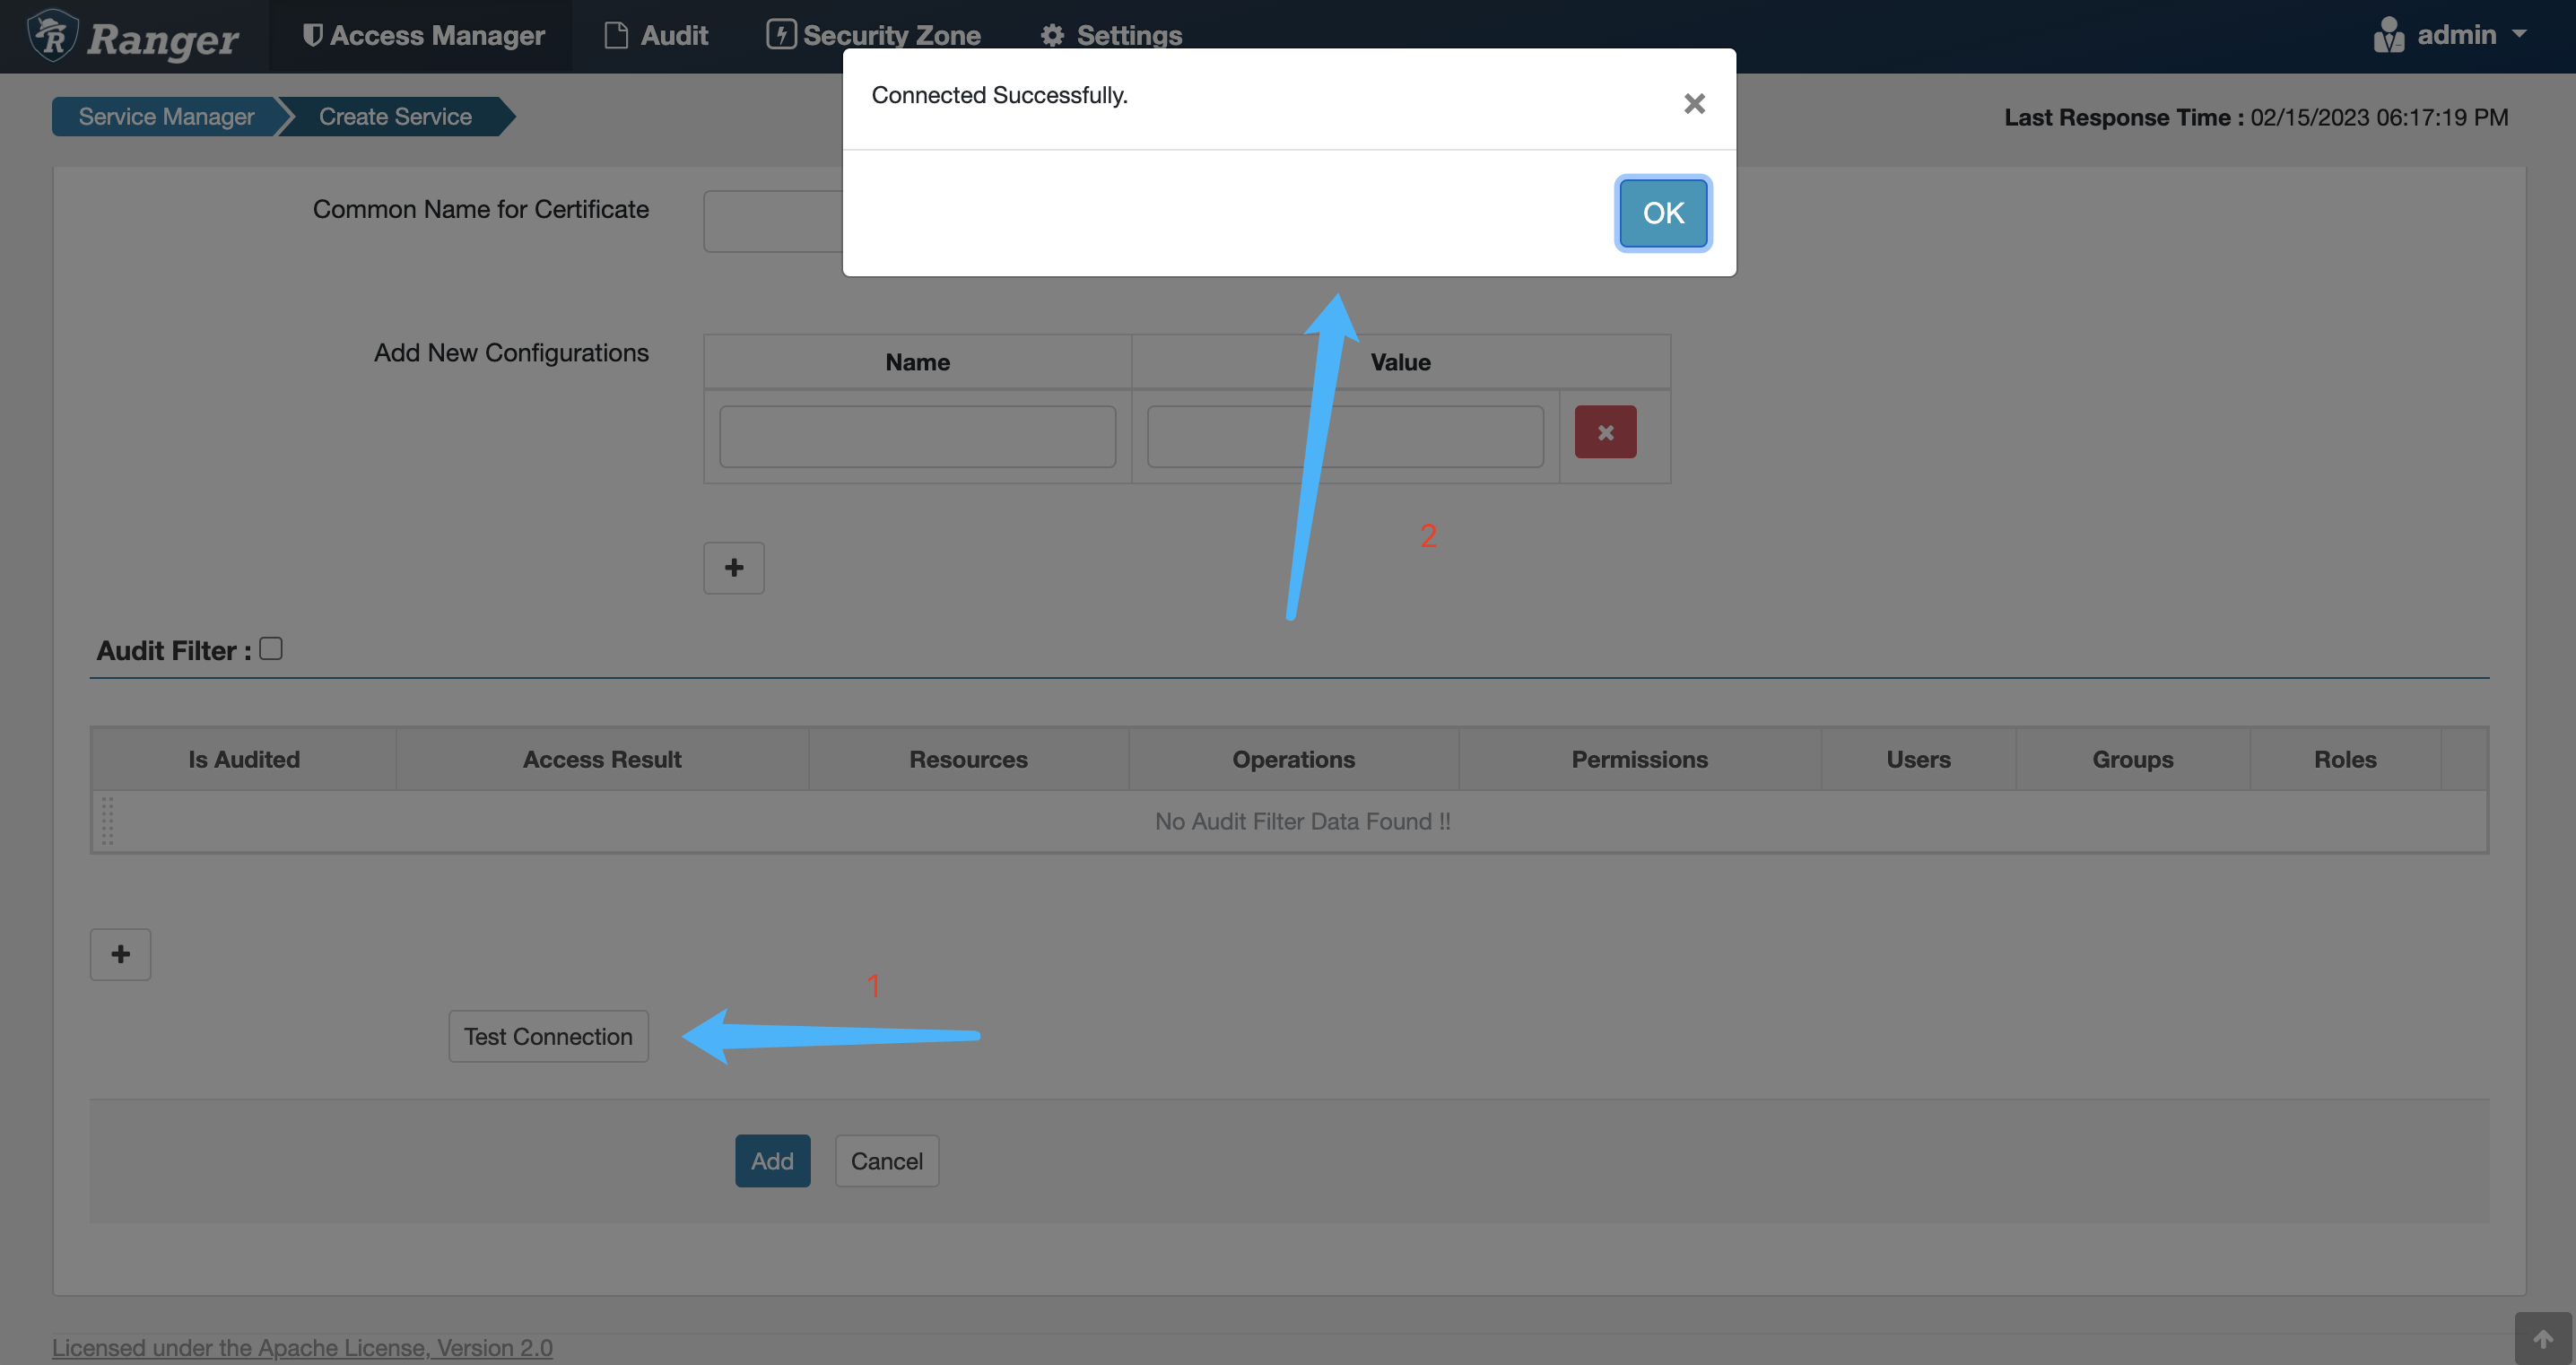
点击‘Test Connection’按钮,测试是否连接成功
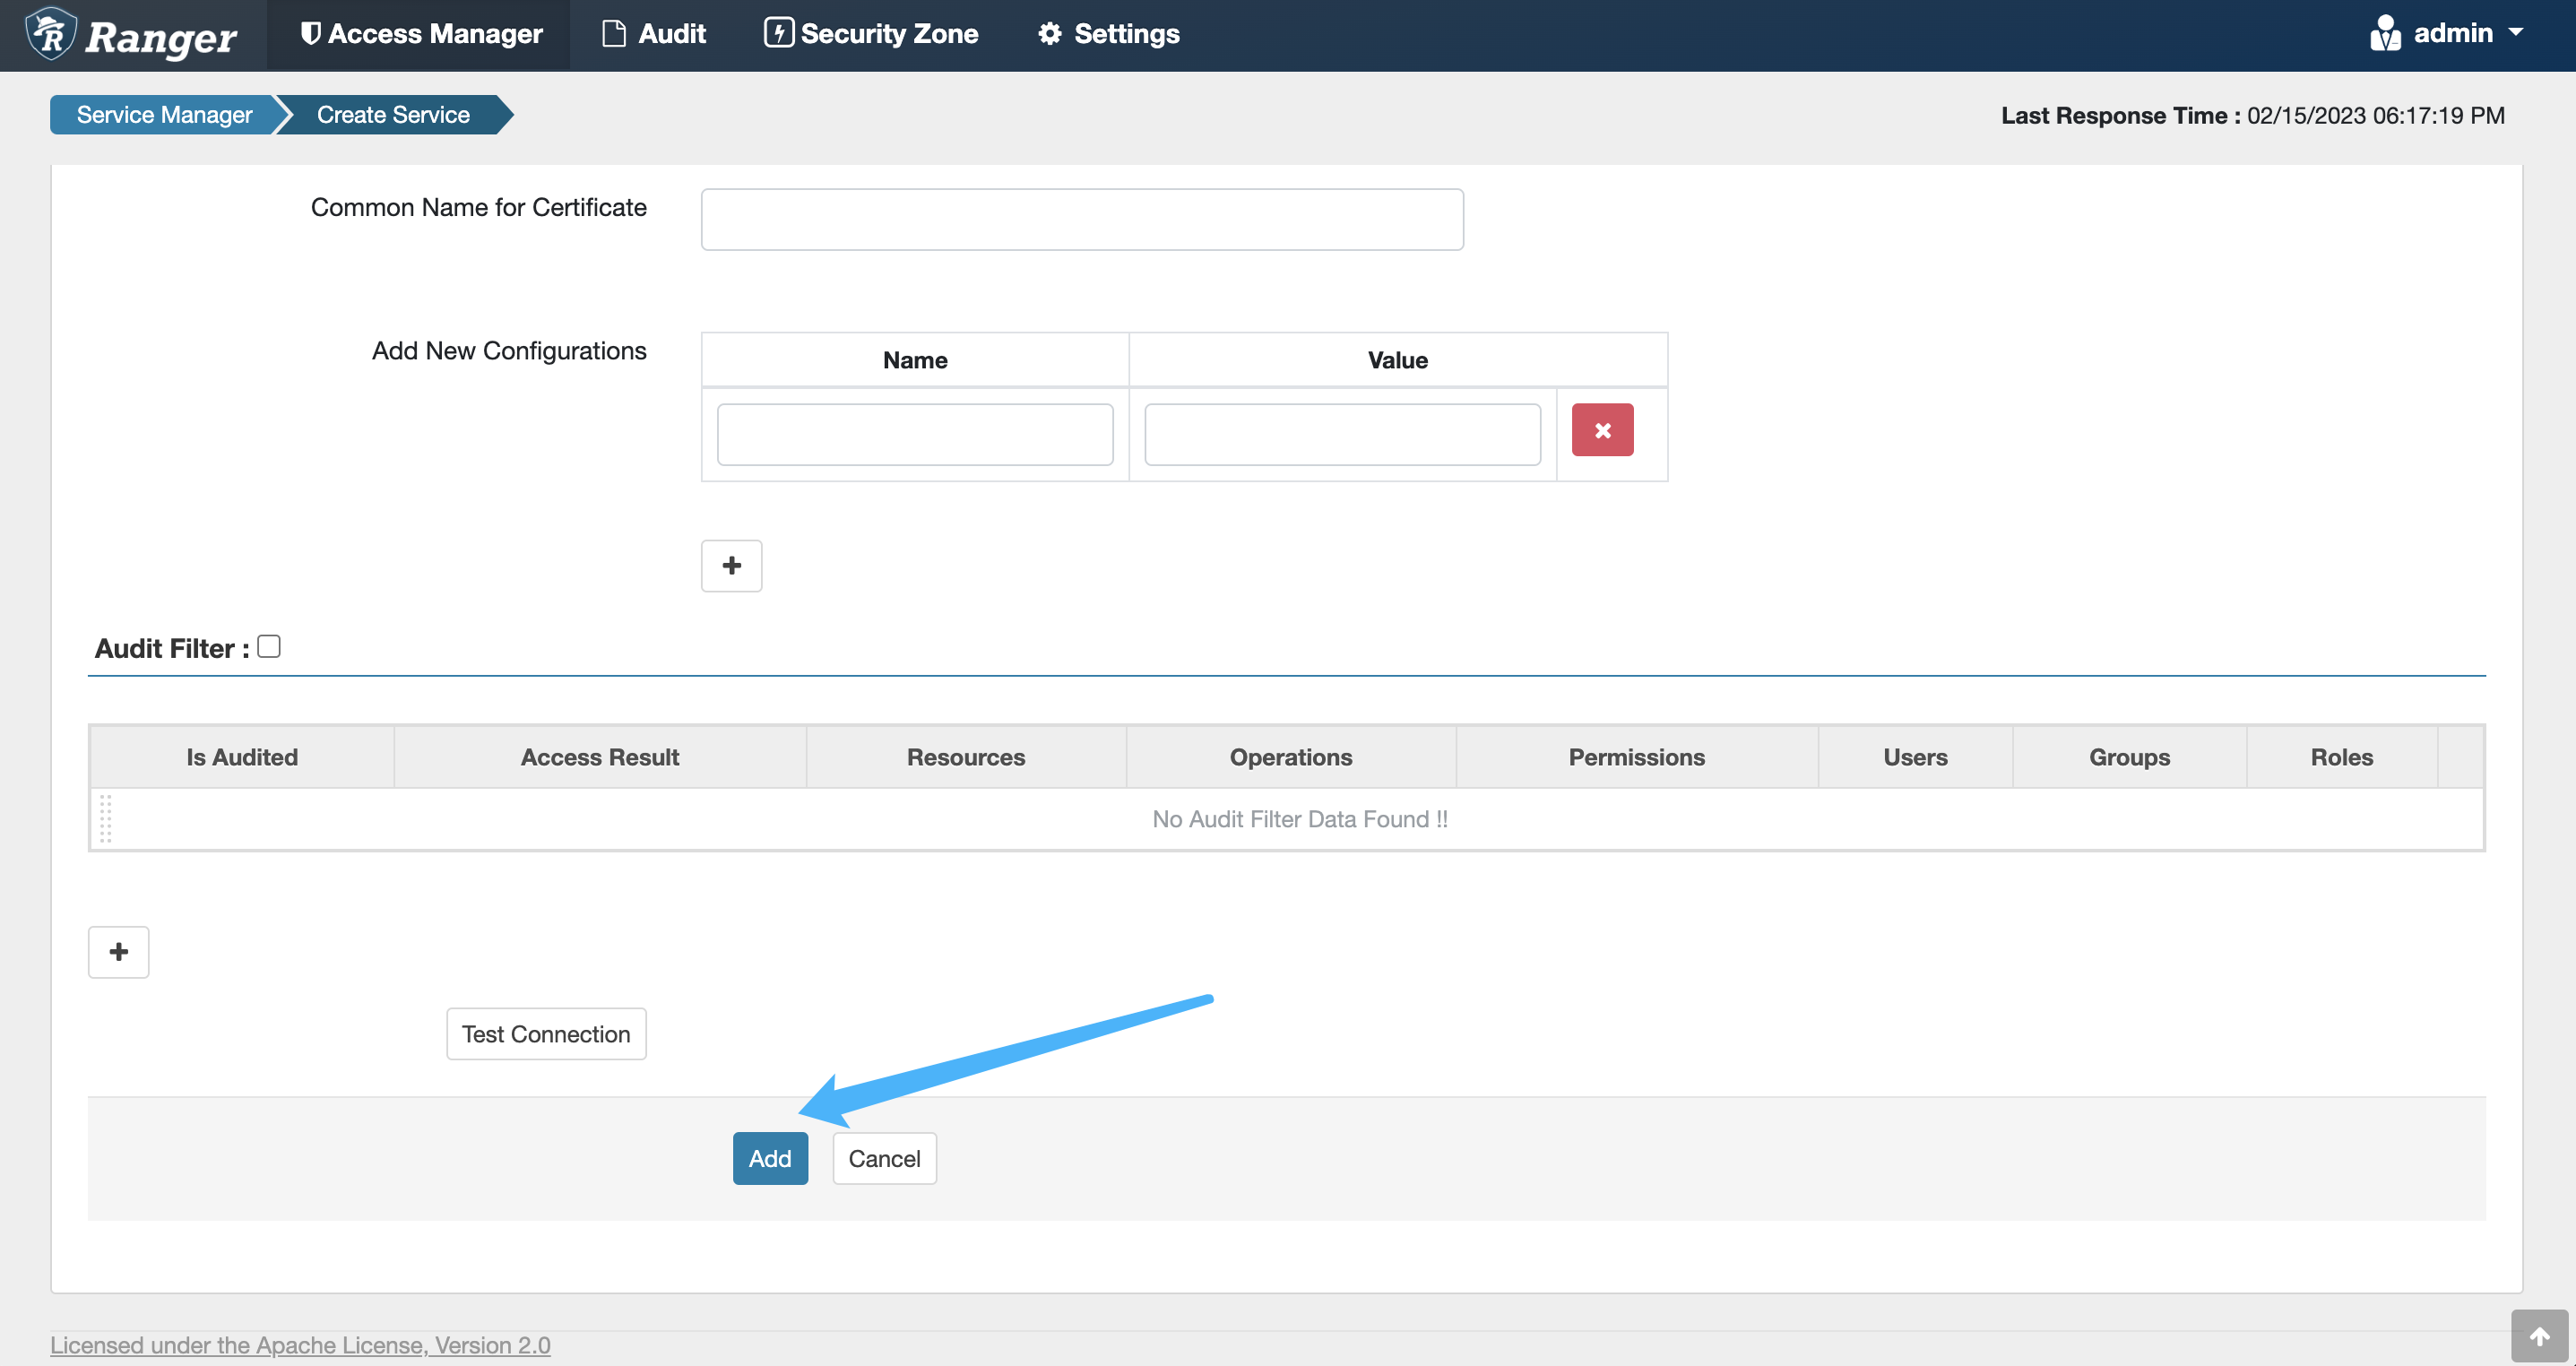
点击‘Save’按钮,保存服务
创建访问策略#
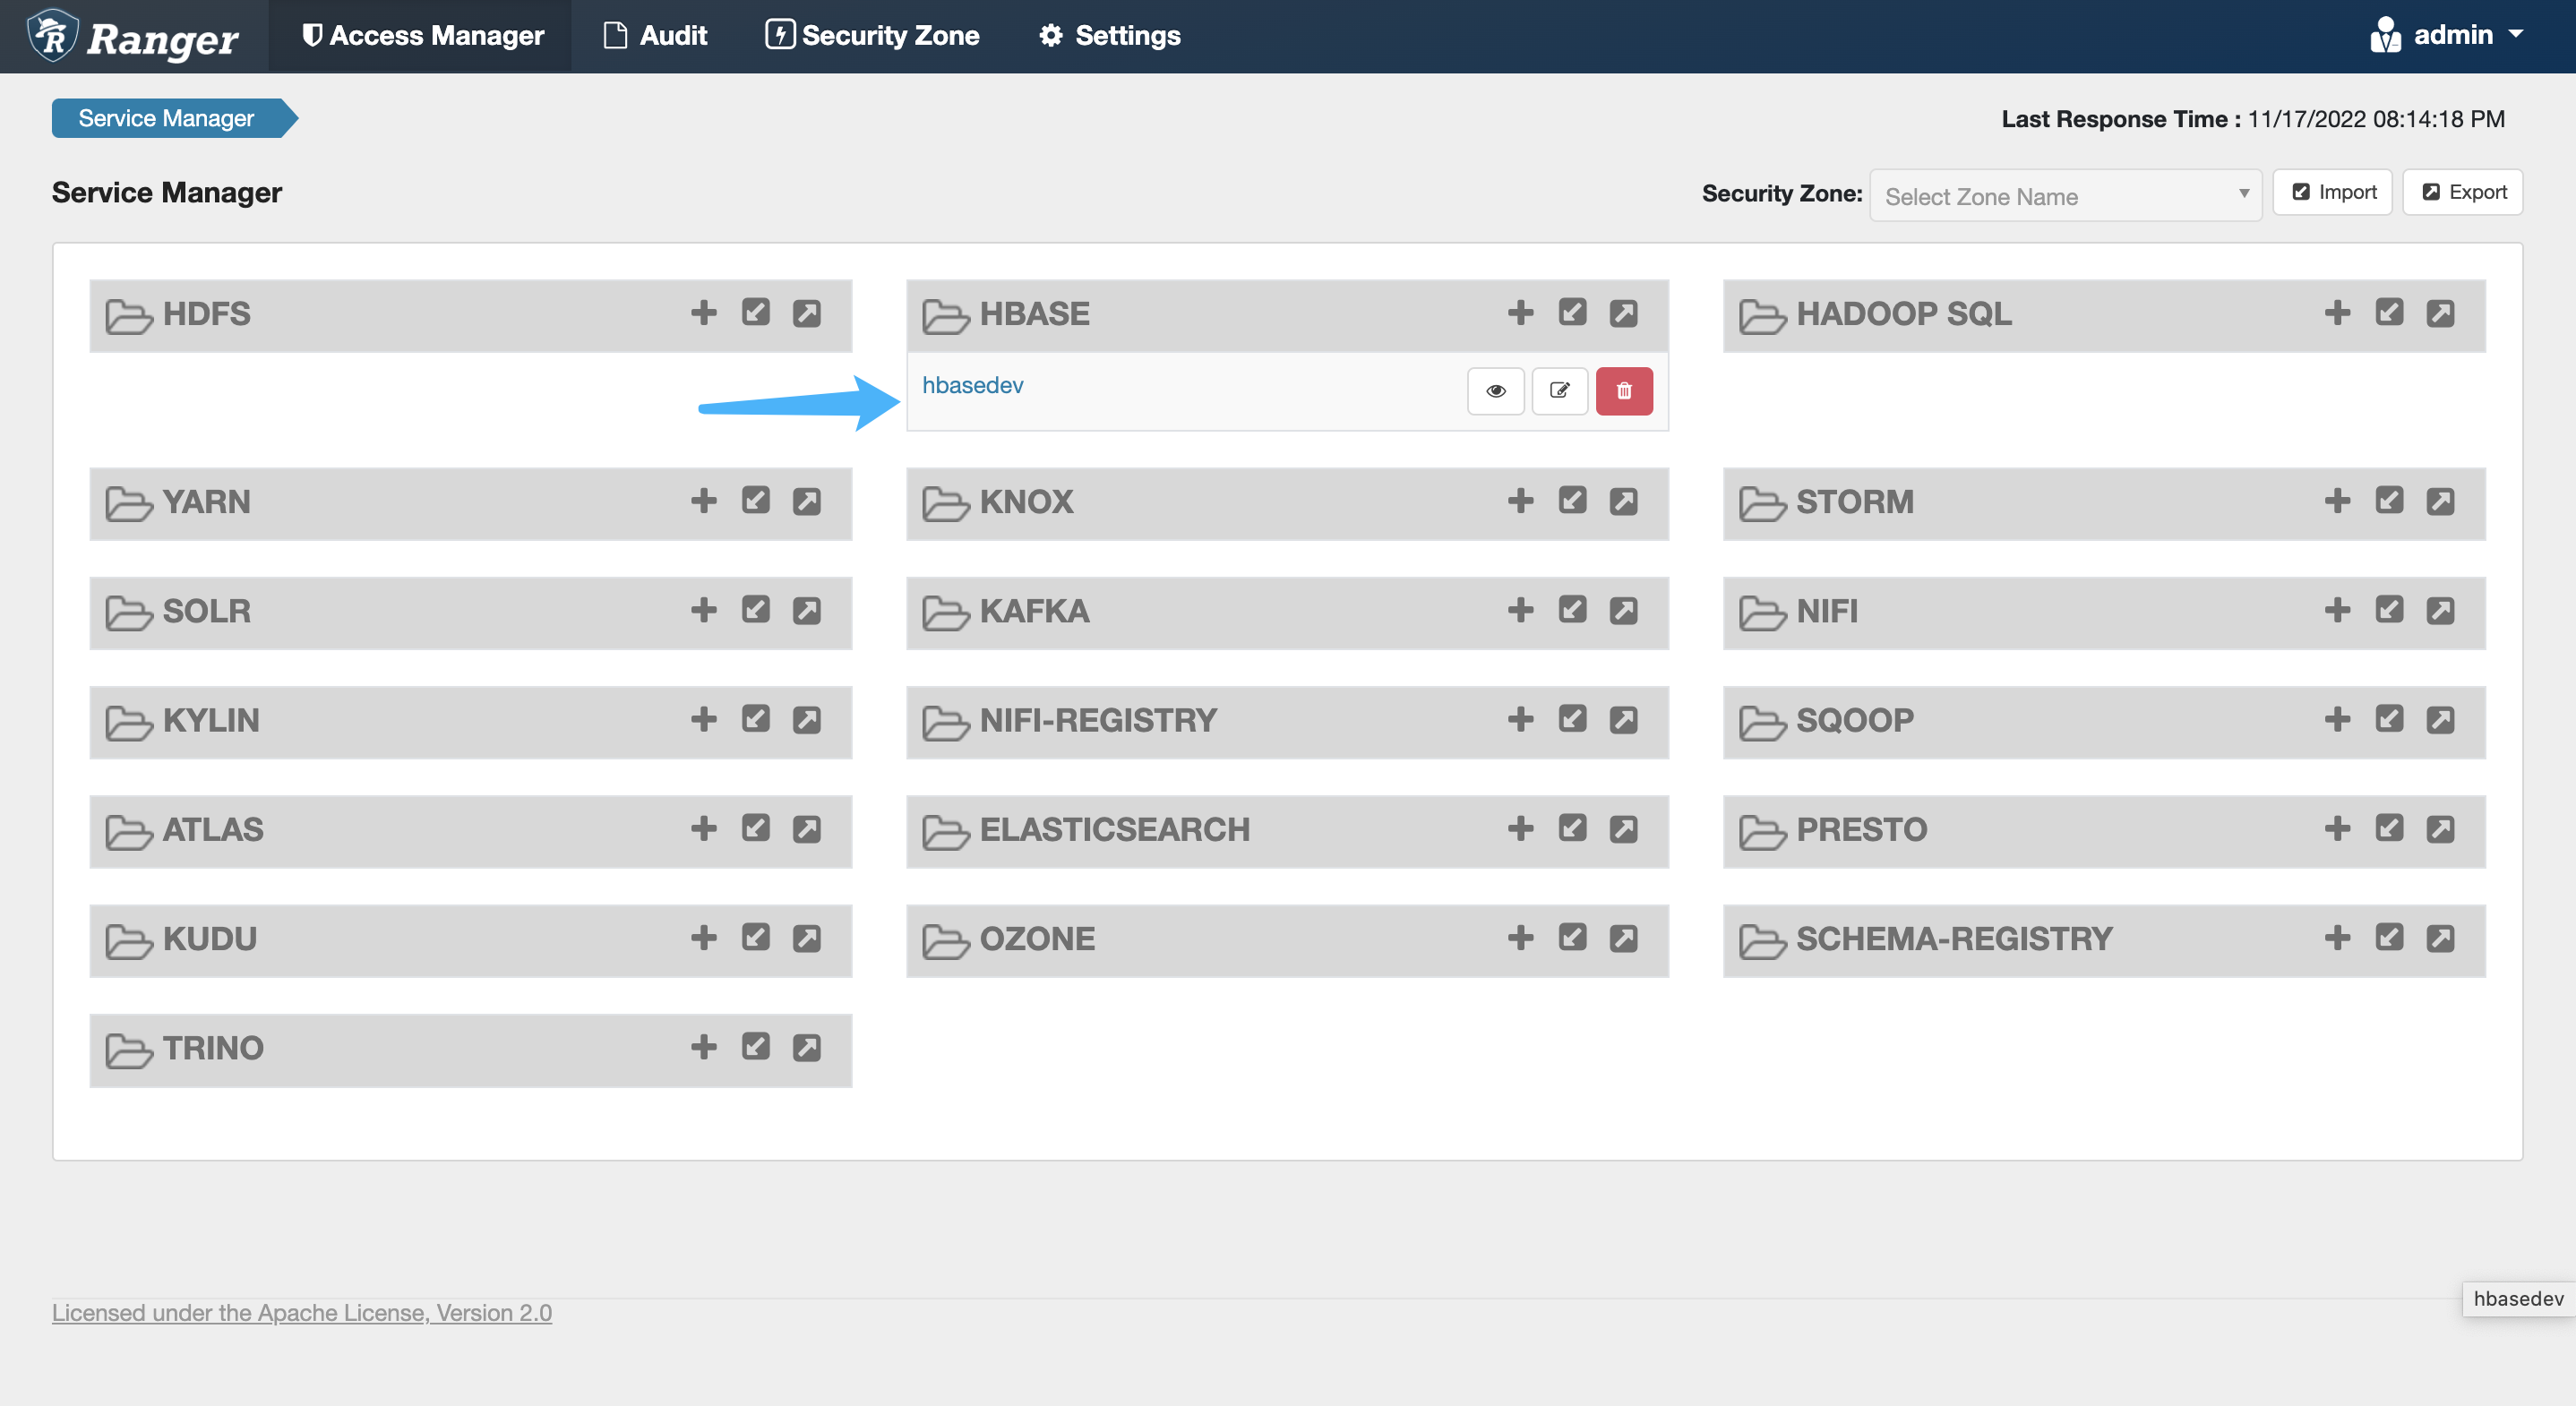
找到刚刚创建的服务,点击名称
点击’Add New Policy’按钮
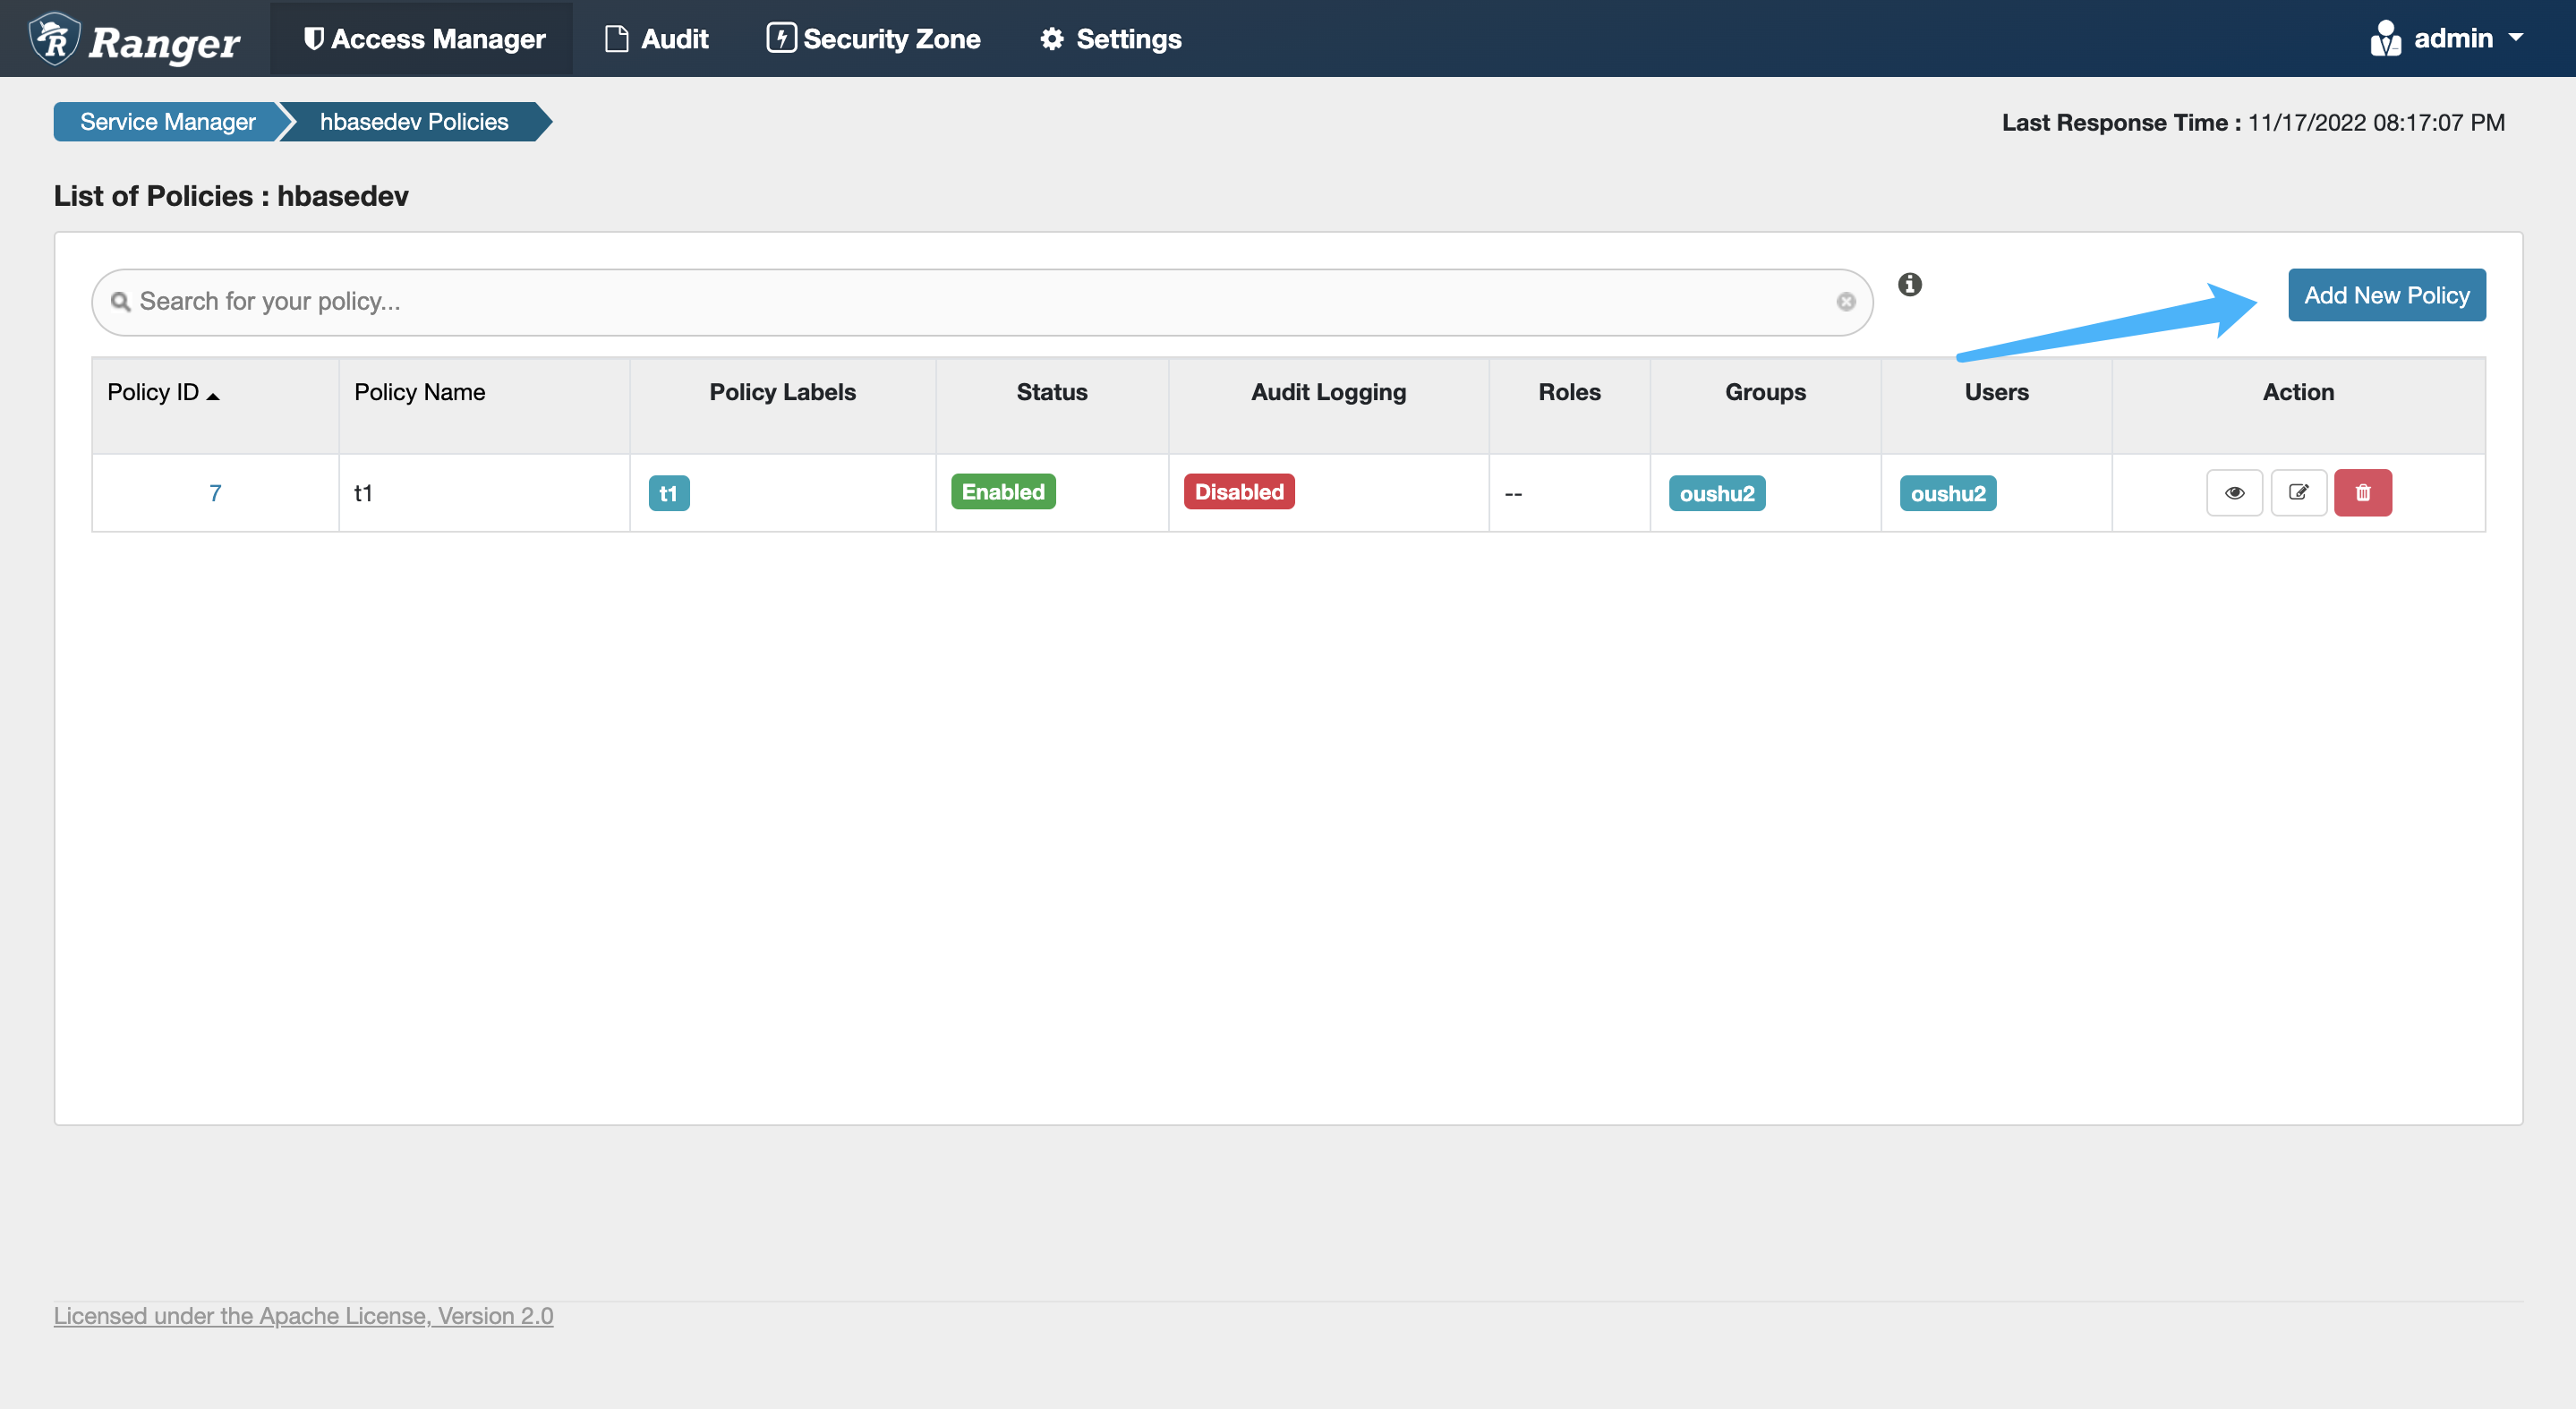
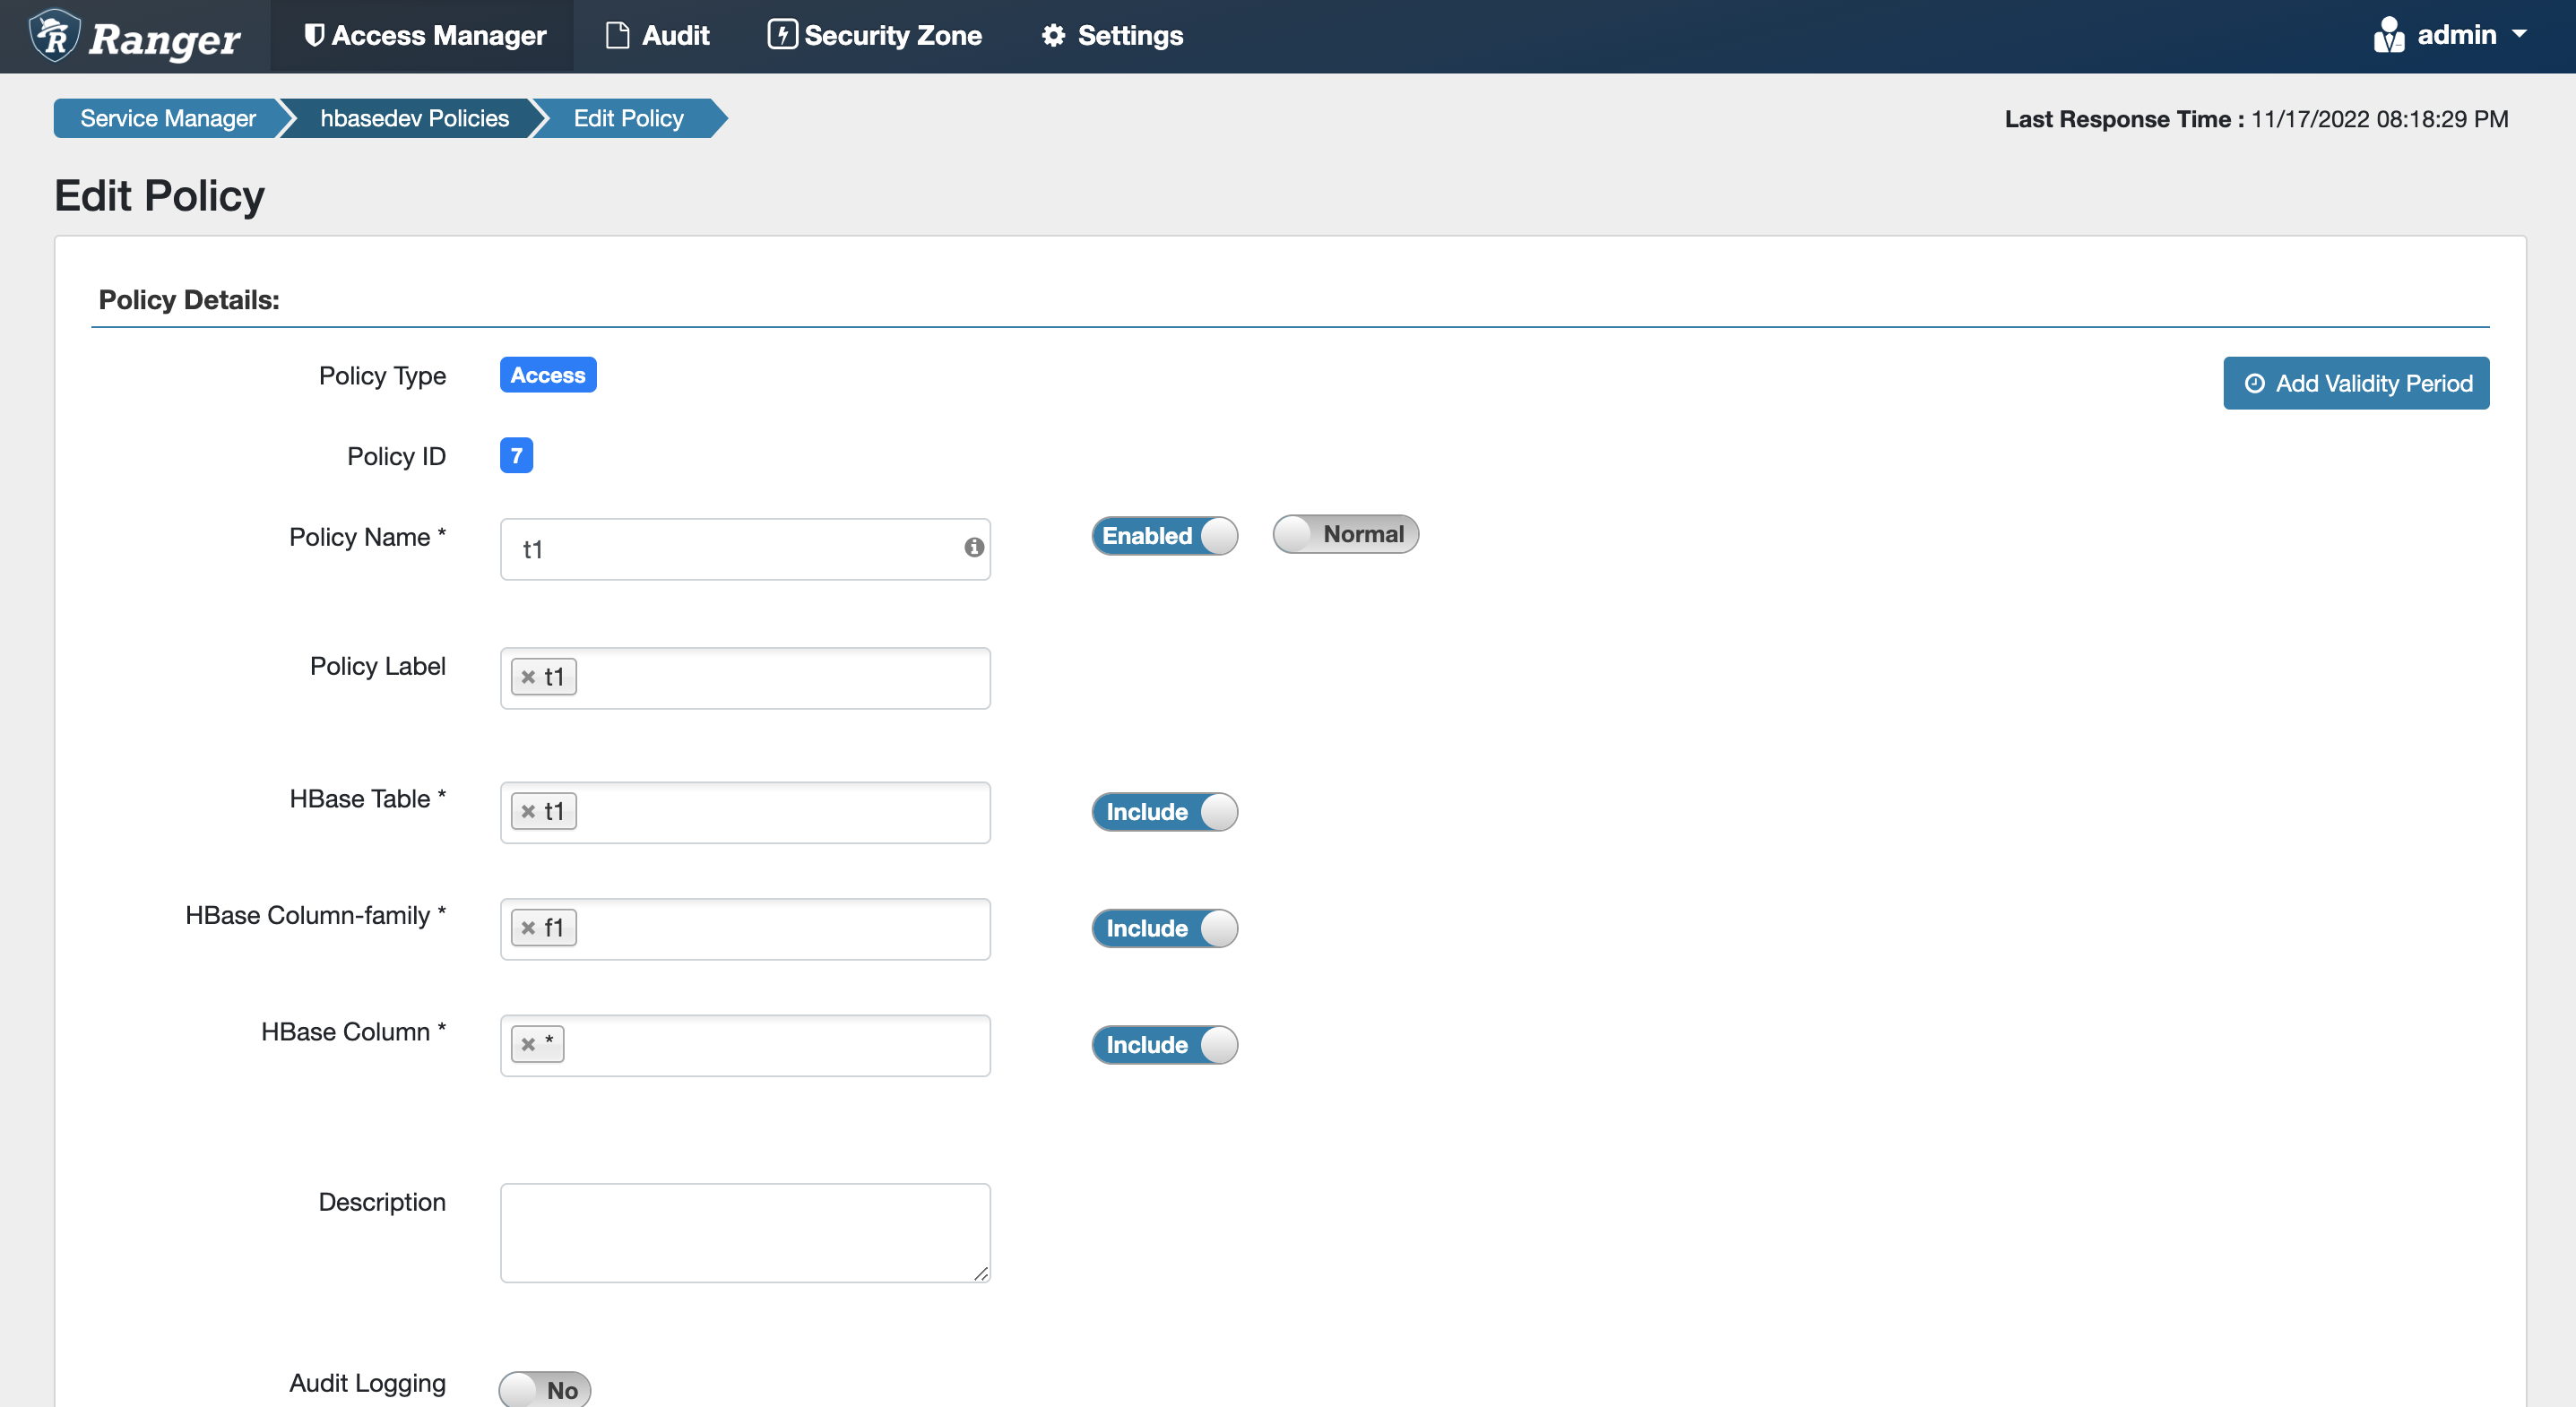
为‘t1’表设置访问策略
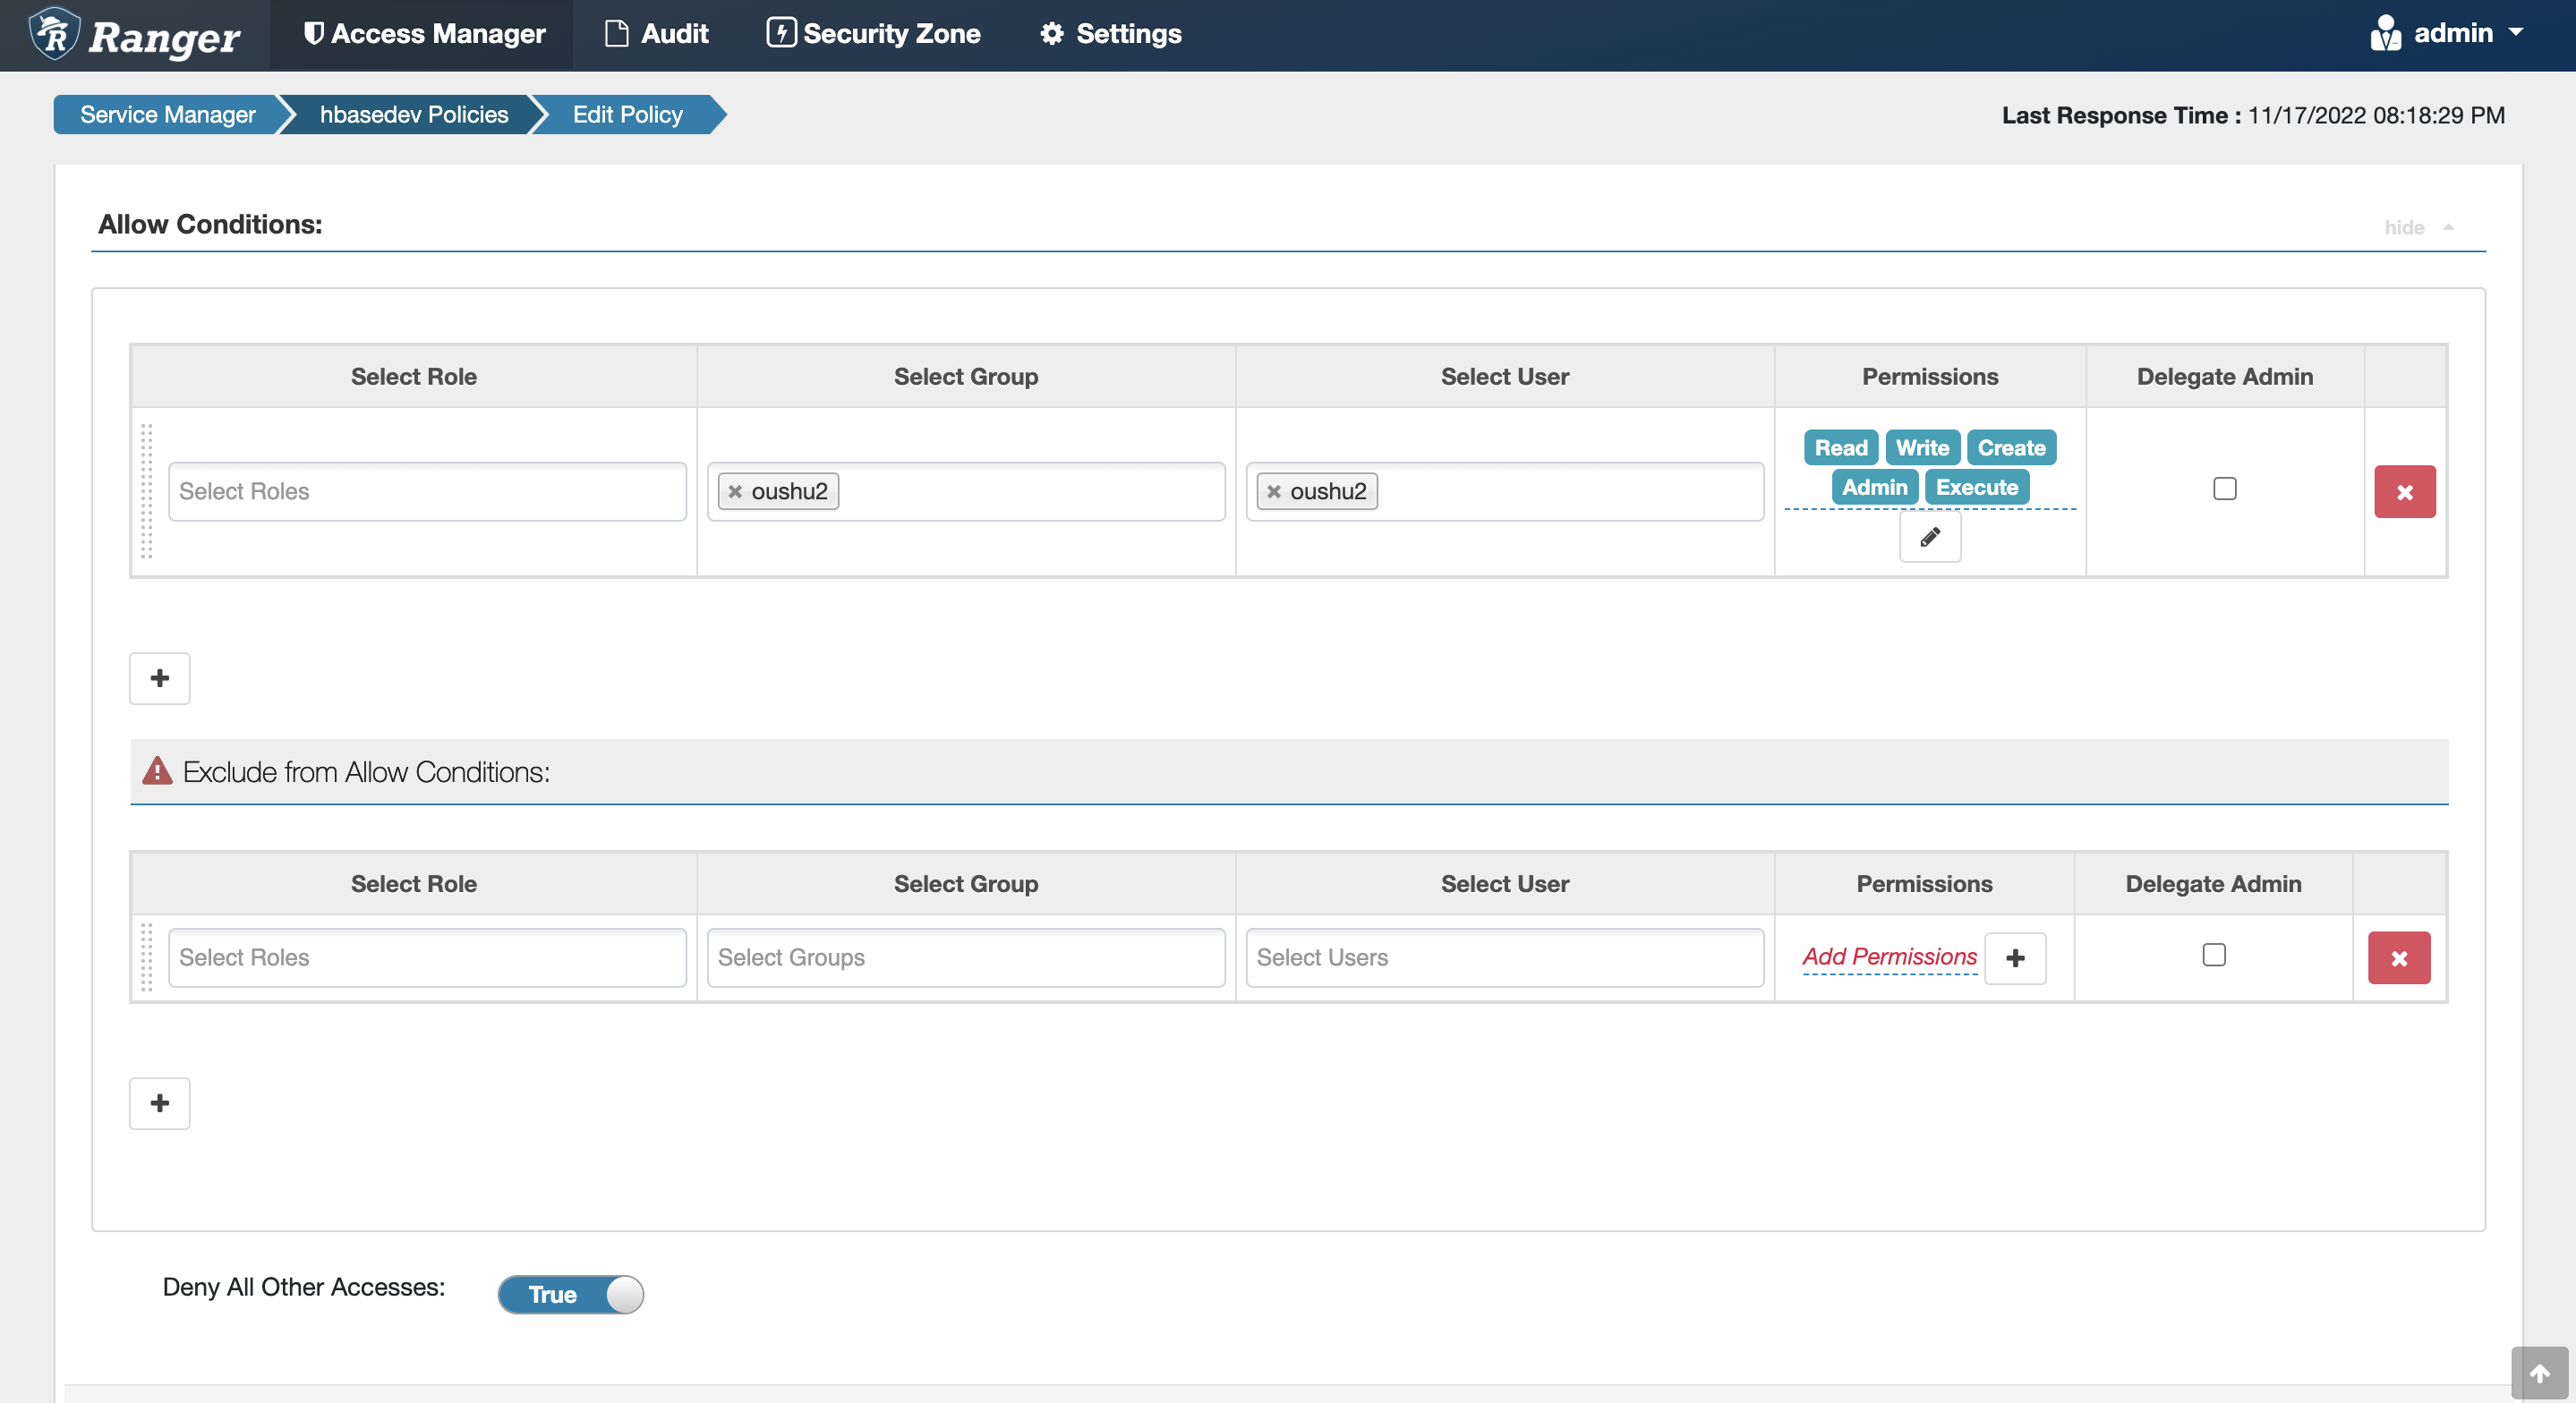
设置只有’oushu2’用户可以访问
测试访问策略是否生效#
登陆oushu1机器,使用oushu2用户访问t1表,可以成功访问
-bash-4.2$ whoami
oushu2
-bash-4.2$ /usr/local/oushu/hbase/bin/hbase shell

hbase:001:0> scan 't1'
ROW                        COLUMN+CELL
 1001                      column=f1:name1, timestamp=2022-11-16T23:09:14.940, value=n1
1 row(s)
Took 0.4540 seconds
hbase:002:0> quit
登陆oushu1机器,使用oushu1用户访问t1表,访问被拒绝
-bash-4.2$ whoami
oushu1
-bash-4.2$ /usr/local/oushu/hbase/bin/hbase shell

hbase:001:0> list
TABLE
0 row(s)
Took 0.3783 seconds
=> []
hbase:002:0> scan 't1'
ROW                                                  COLUMN+CELL
2022-11-17 20:25:41,926 WARN  [hconnection-0x639cb788-shared-pool-0] shortcircuit.DomainSocketFactory: The short-circuit local reads feature cannot be used because libhadoop cannot be loaded.
org.apache.hadoop.hbase.security.AccessDeniedException: org.apache.hadoop.hbase.security.AccessDeniedException: Insufficient permissions for user ‘oushu1',action: scannerOpen, tableName:t1, family:f1.
